A Guide On How to Grill A Turkey for Thanksgiving
Thanksgiving is sort of my Super Bowl, and if you’ve been here for a while, you know that Roy is the turkey expert. Below you’ll find a fabulous guide of tips and tricks on how to grill a turkey.

A Lovely Thought from Teri
I was actually born on Thanksgiving, so I like to think it has always been my special holiday. I love bringing magic to this day, and Roy’s turkey is one of the keys to that magic. He has absolutely perfected making a turkey on the Weber grill. In this guide, I’ll share his and my best tips for creating a perfect Thanksgiving turkey.

Always Think and Plan Ahead
- To be successful, recognize cooking a turkey is about advance planning. Think ahead about everything you will need. Make lists, shop ahead, and stay organized.
- Prep your grill or grills a week in advance to make sure you have all the items you need. And clean it! A clean grill will make all the difference on the day of. Here’s the tools Roy recommends:
- Charcoal grill with a grate that opens on one or both sides to add more charcoal as needed
- Charcoal (lump is ideal)
- Roasting rack to hold turkey
- Disposable 6×10-inch aluminum baking pan to catch drippings
- Meat thermometer
- Remember your turkey can take up to three days to thaw in the fridge. And ideally, it will be completely defrosted so it can rest overnight to cure the skin. Pay attention to the size of your turkey to know how long it needs in the fridge to thaw.
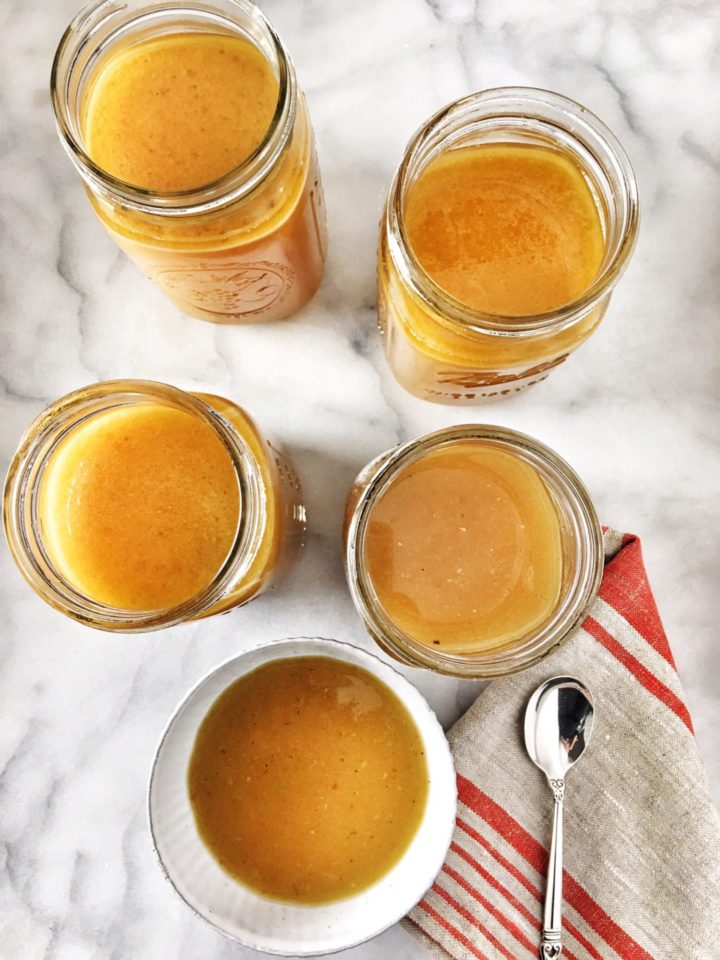
- Do-ahead turkey drippings are the best hack to delicious gravy. There is no need to stress about having enough drippings on the day of from your turkey. Once you do them ahead of time, you’ll never go back. You get rid of all the stress without sacrificing any flavor.
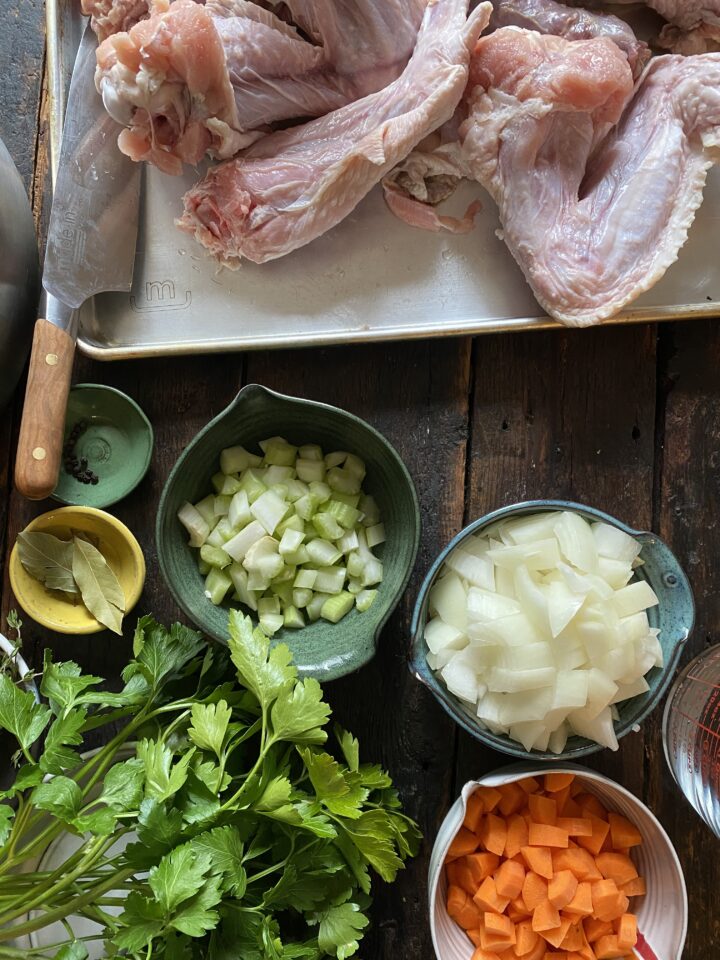
- Turkey Stock is the magic elixir behind everything from gravy to stuffing on Thanksgiving. Make it in advance and freeze it so it’s ready for the big day.
- Choose your turkey carefully. Roy and I love to opt for two smaller birds, around 13 pounds each, rather than a large bird. Not only are they easier to cook, but one can also work as a stunt turkey for a beautiful edible centerpiece.

Brining Your Turkey
- Once your turkey thaws, remove the packet of neck, giblets, liver and heart. Save the neck and gibblets to put in your catch pan. If you have fans of heart or liver, you can set it aside for another purpose or discard.
- Pat the skin dry with paper towels. You want the skin to be as dry as possible for best results.
- Keep your brine simple. A complicated brine is not necessary, and you can achieve the same effect by heavily salting the bird with Celtic Sea Salt® and letting it rest in the fridge over night. The goal of the brine is to allow the salt to penetrate the meat, breaking down proteins for the juiciest, most delicious result.
- After letting the bird dry out overnight, wipe off all the excess salt. Pat the bird dry again. While you are doing this, cut up two sticks of butter into pats. Put these in the freezer while you are wiping off the salt.


Prepare Your Turkey To Cook
- Remove the large bits of turkey fat (usually found near the opening of the cavity). You will use this to insert under the breast of the bird along with some of those frozen pats of butter.
- Remove the wish bone to make carving easier after the bird has been cooked.
- Gently work your fingers between the skin of the turkey and the breast to loosen the skin so you can slide in the butter and fat pieces. This will baste your bird.
- Use cotton twine to tie the legs together. This ensures even cooking of your bird.


Grilling Your Turkey
- Use indirect heat to cook on a weber grill. This will ensure you have a beautiful moist bird because you are cooking via a low and slow method and avoid burning the skin.
- Indirect means the charcoal is on either side of the bird and you cook it like its an oven, with a large deep aluminum pan to catch your drippings.
- If you live somewhere where it is cold on thanksgiving, keep an eye on your coals. Make sure you have a timer to remind yourself to check the coals every 30 minutes. You don’t want the coals to die down. Keep them burning!
- The birds will cook faster than in the oven. Monitor the bird closely to avoid overcooking. Check the temperature in the thickest part of the leg to check for doneness. Make sure you are not hitting a bone with the thermometer.


Rest Your Turkey and Enjoy
Allow your turkey to rest at least 30 to 45 minutes prior to carving. This resting period is crucial to make sure the juices stay in the turkey. If you cut too soon, you risk letting all of the juices out of your bird before eating.


Frequently Asked Questions About Thanksgiving Turkey
You can certainly stuff your turkey, but Roy often opts not to. To get the turkey evenly cooked, it’s easiest to cook it without the cavity stuffed.
You need three zones in order to do this on your gas grill, because you need the airflow around the turkey. If you don’t have three zones, ask a neighbor to borrow their Weber!
Either salted or unsalted butter works under the skin.
Either option works, but I like to wipe it off to keep the turkey nice and dry.
You can baste your turkey with either butter or olive oil.
Make sure to wipe the salt off before cooking to make sure your pan drippings aren’t too salty to use in a gravy.
It’s very slight, and I find it to be a lovely flavor.
There are so many fabulous options. You could do a lovely salad, old school corn souffle (or this gluten free version), mashed potatoes, green beans, the options are endless.
More Thanksgiving Prep Tips
If you are looking for more prep tips for your Thanksgiving celebration, check out this post on how to host a Friendsgiving. Whether you are have a group of friends or the whole family over, these tips will help make the day seamless.

Teri’s Top Tips for Celebrating the Holidays All Year Long

If you make one of my holiday recipes, leave a comment and let me know what you think. If you’re looking for more inspiration, sign up for our substack, and follow along on Pinterest, Instagram, and TikTok to join in all the fun!
Print
Salt Brined Turkey on the Grill
- Prep Time: 15 minutes
- Brine Time: 3-24 hours
- Cook Time: 3 hours
- Total Time: 3 hours 15 minutes
- Yield: 8 servings
- Category: Dinner
- Method: Grill
- Cuisine: American
- Diet: Gluten Free
Description
This is the perfect way to grill up your turkey for Thanksgiving!
Ingredients
- 1 13- to 14-pound turkey, thawed if frozen
- Celtic sea salt
- ½ stick butter, cut in pieces
- 1 large onion, cut into quarters
- 4 large carrots, cut into large chunks
- ½ bunch celery, cut into large chunks
- Olive oil, for basting
Tools:
- Charcoal grill with a grate that opens on one or both sides to add more charcoal as needed
- Charcoal (lump is ideal)
- Roasting rack to hold turkey (optional)
- Disposable 6×10-inch aluminum baking pan to catch drippings
- Meat thermometer
Instructions
- Pat the turkey dry with paper towels and place on a baking sheet. Generously cover with ¼ cup of Celtic Sea Salt and place in the refrigerator uncovered. Let the turkey sit overnight, or for a minimum of 3 hours.
- An hour prior to cooking, remove the turkey from the fridge and let sit at room temperature. Brush off the salt and tuck the butter under the skin in multiple places along the breast. Pat the turkey dry with paper towels and tie the legs together with cotton twine to ensure even cooking.
- Meanwhile, prepare the grill: Light the charcoal according to your preferred method. Once the coals turn grey, you’ll want to set up two zones – one for direct and one for indirect heat. As a master griller, Roy has a grate with built-in dividers that keeps the lit charcoal along the sides, with a space in the middle as the indirect zone. If you don’t have this piece of equipment, place the lit charcoal on one side of the grill, keeping the other side as the indirect zone.
- Nestle the aluminum pan in the indirect zone to catch the drippings from the turkey. You will use drippings later for gravy. To the pan, add the onion, carrot, celery, and the turkey giblets and neck if you have them. Cover the charcoal and pan with the grill grate positioning the side that opens over the burning charcoal.
- Place the roasting rack, if using, on the grate over the aluminum pan and place the turkey on the rack. (Or, place the turkey directly on the grate.)
- Cover the grill, keeping the vents open on the lid and under the fire. Cook the turkey until it reaches 165F in the thickest part of the leg, about 3 hours, adding more charcoal to the grill as needed. You’ll want to keep the grill temperature just north of 300F. If you don’t have a thermometer on your grill, place your hand over the coals and hold it there. If you can hold it for more than 5 seconds, add more charcoal. Be sure to set a timer and check the coals every 30 minutes! You don’t want the fire to burn out.
- Once the turkey is browned, baste it with a little olive oil. After about 2 hours, baste it one more time.
- When the turkey is done, remove the turkey from the grill and place on a large platter or large cutting board and let it rest.
- While the turkey is resting, make the gravy: Carefully remove the aluminum pan from the grill using heat-safe gloves or oven mitts. The pan will be very hot, so please take care when removing it! Strain the drippings into a pot and make your gravy using your own recipe or ours.
- When ready to serve, carve the turkey and enjoy!
Nutrition
- Serving Size:
- Calories: 631
- Sugar: 2.4 g
- Sodium: 1545.6 mg
- Fat: 15.7 g
- Carbohydrates: 5 g
- Protein: 113.8 g
- Cholesterol: 347.3 mg
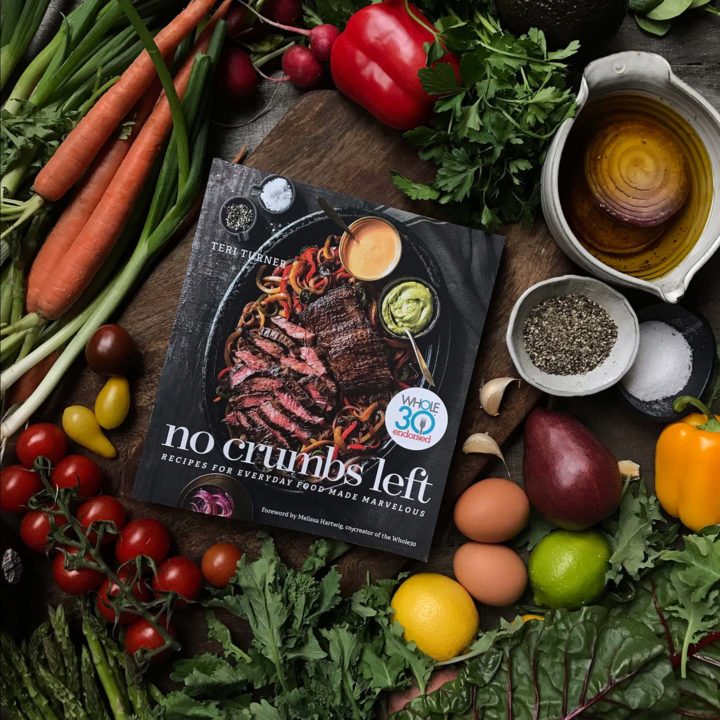
Do you have a copy of the No Crumbs Left cookbook yet?
Food is my love language, and this book is a guide to getting you in the kitchen with me, rolling up your sleeves, and reigniting your passion for everyday cooking. Woven throughout the book are my Teri’s Tips as well.
This cookbook is a love letter to my mother because it offers the recipe for a well-lived life.
That’s perfect for Thanksgiving
We did it — actually my new son in law did —- let me tell say — best turkey we have ever had. Moist Smokey just delicious and it freed up all my oven space. The grandkids even said it was fabulous. The best — thanks for the inspiration
Grilled my turkey this Thanksgiving and it was so juicy. Indirect heat really works. Best turkey we ever had.
Grilling outside is genius because it freed up my oven for sides. I am definitely doing this again next year.
Thanksgiving is sort of my Super Bowl, and if you’ve been here for a while, you know that Roy is the turkey expert.